

Overview
TrueEngage lets you deploy WebRTC Voice or Video calls on kiosks or public terminals — providing a seamless way for visitors to connect with agents through real-time communication directly on-screen.
You can deploy a dedicated kiosk view that launches either automatically or through a custom button, or you can enable standard engagement triggers (like widget icons or heads-ups) for a more traditional widget experience.
This guide explains how to configure your kiosk setup for either Voice or Video WebRTC calls using the TrueEngage management panel.
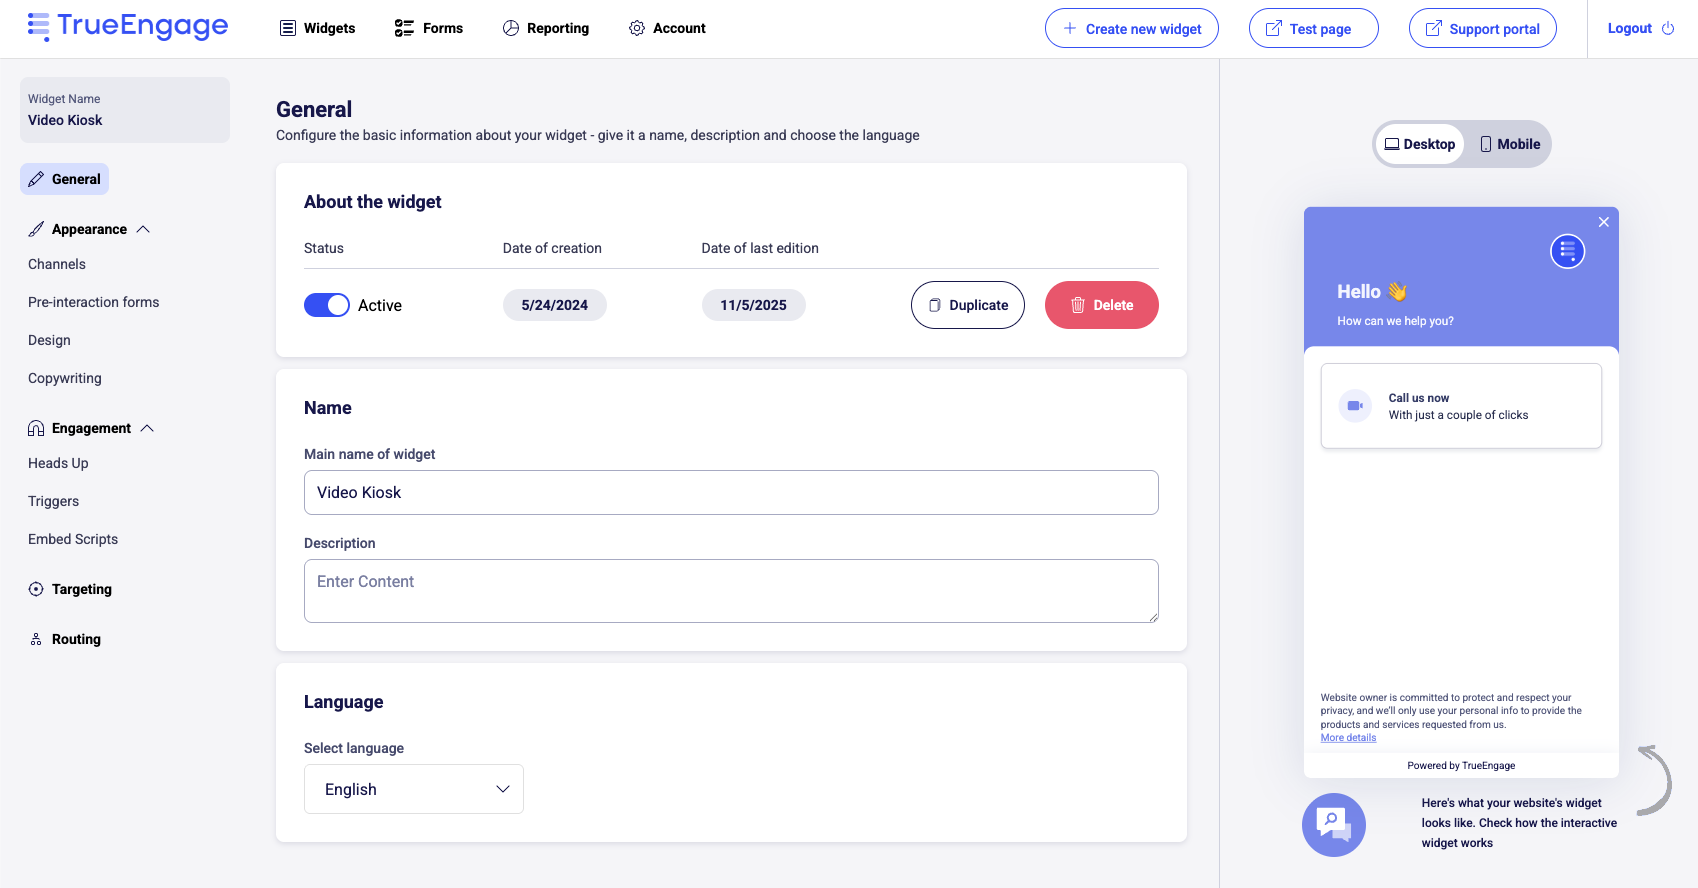
Step 1: Create or Select Your Widget
-
In your TrueEngage dashboard, go to Widgets.
-
Create a new widget or select an existing one (for example, Video Kiosk).
-
Under General → Name, give your widget a clear name such as “Voice Kiosk” or “Video Kiosk”.
-
Ensure the widget status is Active.
📸 Example:
Step 2: Enable the WebRTC Channel
-
Navigate to Appearance → Channels.
-
Enable either:
-
Voice Webcall (for WebRTC voice calls), or
-
Video Webcall (for video calls using Vonage).
-
-
Disable all other channels (such as Chat, WhatsApp, Messenger) to create a dedicated kiosk experience.
📸 Example:

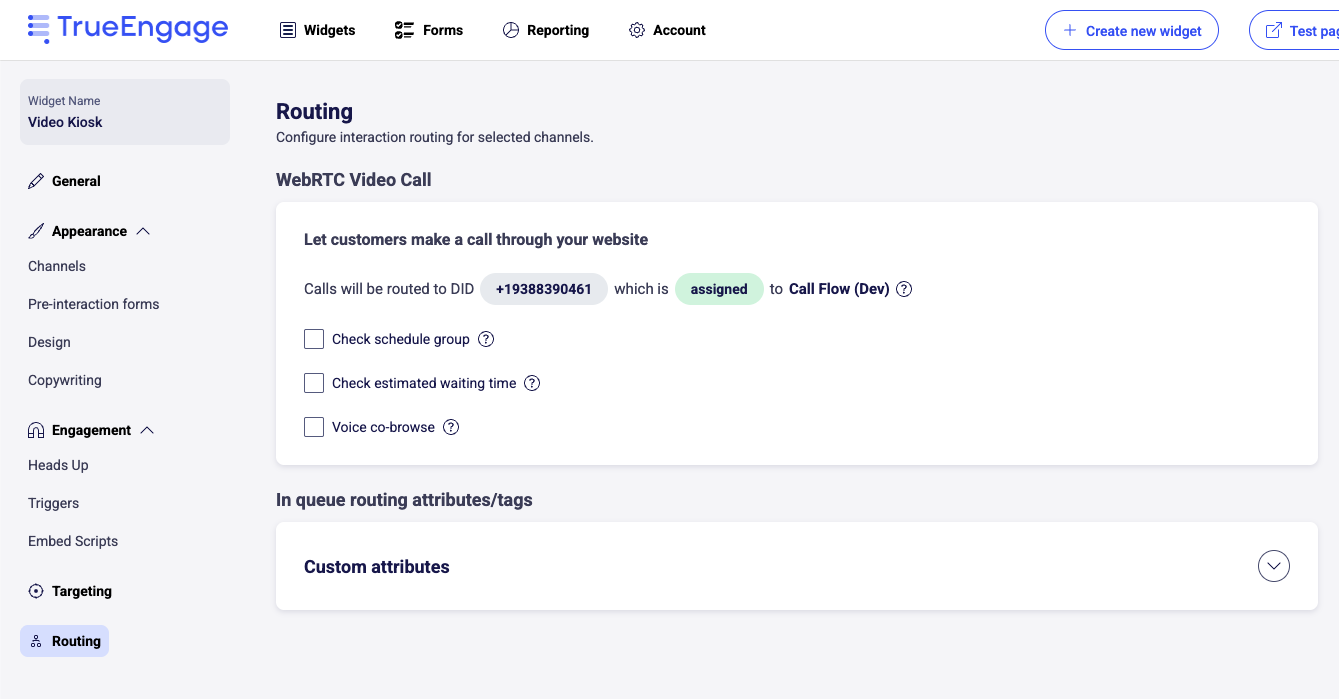
Step 3: Configure Routing
-
Go to Routing in the left-hand menu.
-
Under WebRTC Video Call or Voice Call, ensure that:
-
The widget is routed to a DID (automatically assigned during setup).
-
The DID is assigned to a Call Flow in Genesys Cloud.
-
-
Optionally, configure:
-
Check schedule group
-
Check estimated waiting time
-
Voice co-browse (for enhanced support scenarios).
-
📸 Example:
Step 4: Embed the Kiosk Widget
You can deploy the widget either through manual embedding or by enabling engagement triggers.
Option 1: Manual Embed (Recommended for Kiosks)
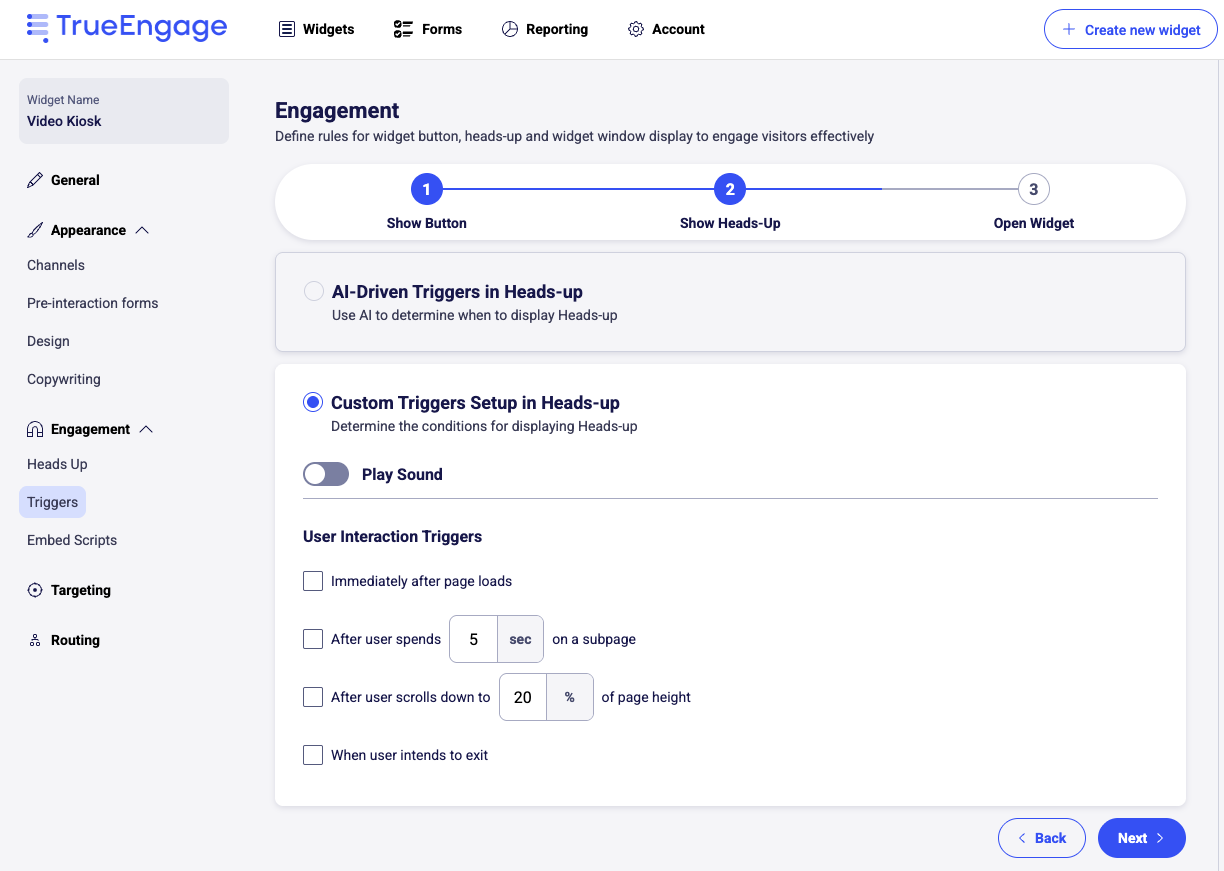
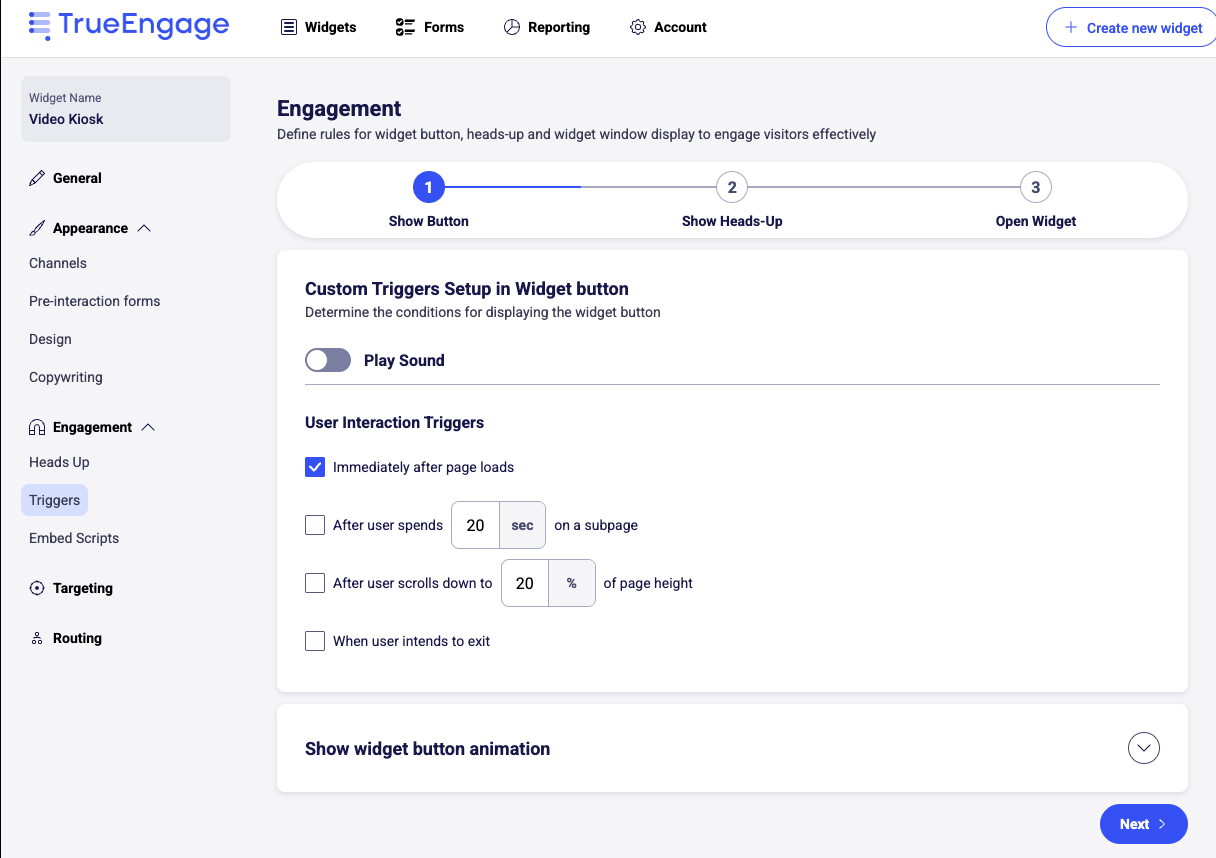
- Go to Engagement → Triggers.
- Disable 'Show Button' and 'Show Heads-Up' triggers (de-select all options).
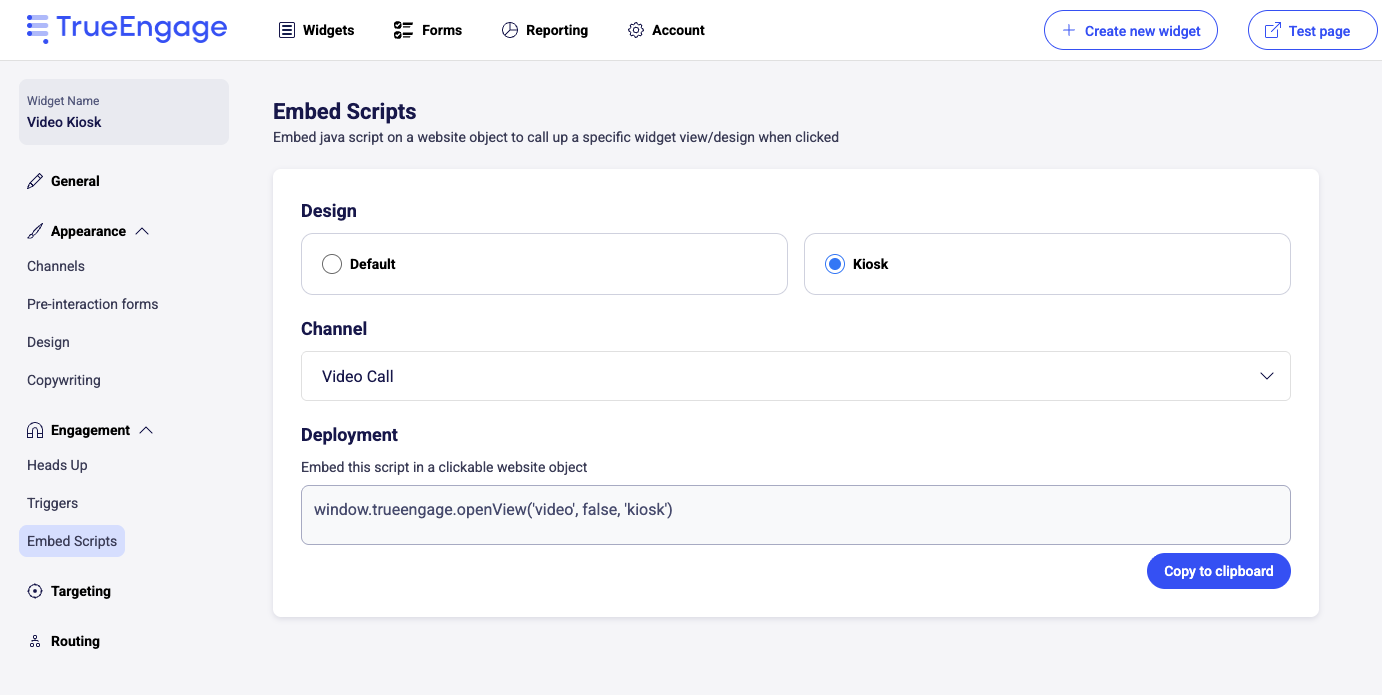
- Go to Engagement → Embed Scripts.
- Choose the Kiosk design option.
- Select the appropriate channel (Voice Call or Video Call).
- Copy the generated JavaScript snippet.
For example:
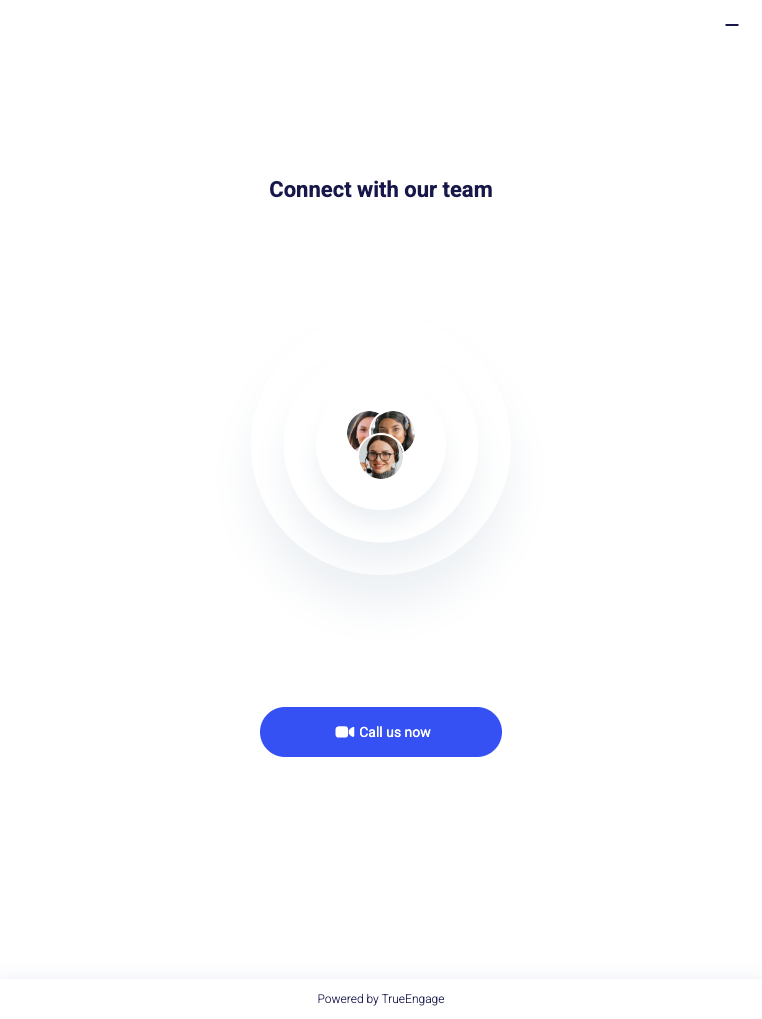
window.trueengage.openView('video', false, 'kiosk');
-
Add this script to a clickable element on your kiosk webpage — for example, a “Call Support” button.
When the visitor taps the button, the kiosk interface will launch directly into the call view.
📸 Example - engagements disabled:

Option 2: Enable Engagements (Optional)
If you prefer the widget to appear like a normal website interaction:
-
Go to Engagement → Triggers.
-
Enable Show Button or Show Heads-Up.
-
Define how and when the widget appears (e.g., after time on page or user scroll).
📸 Example - show the widget button immediately after page loads:
Step 5: Configure Additional Kiosk Settings (Optional)
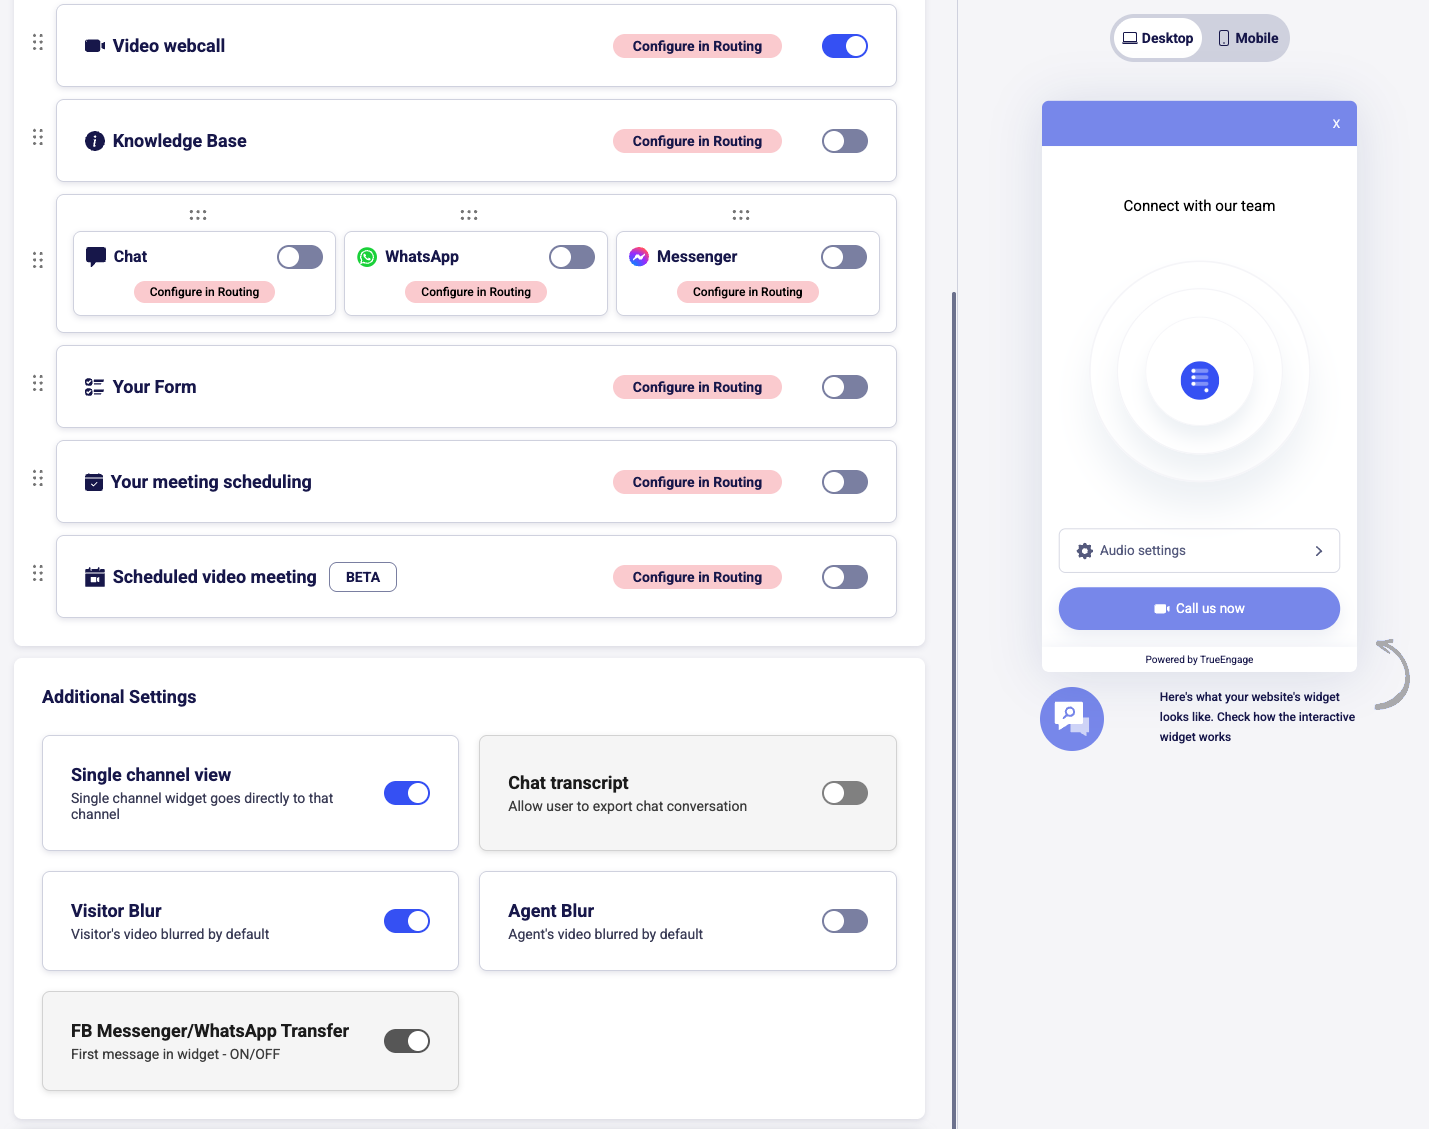
In Channels → Additional Settings, you can fine-tune the kiosk experience:
-
Single Channel View – Directly launches the selected channel (ideal for kiosk mode).
-
Visitor Blur / Agent Blur – Automatically blur video for privacy.
📸 Example:
Step 6: Test Your Setup
Click Test Page in the top-right corner of your TrueEngage dashboard to preview the kiosk interface.
-
Verify the call launches properly.
-
Confirm the routing leads to the assigned DID and Call Flow in Genesys Cloud.
Once tested, deploy the widget script to your kiosk application or website page.
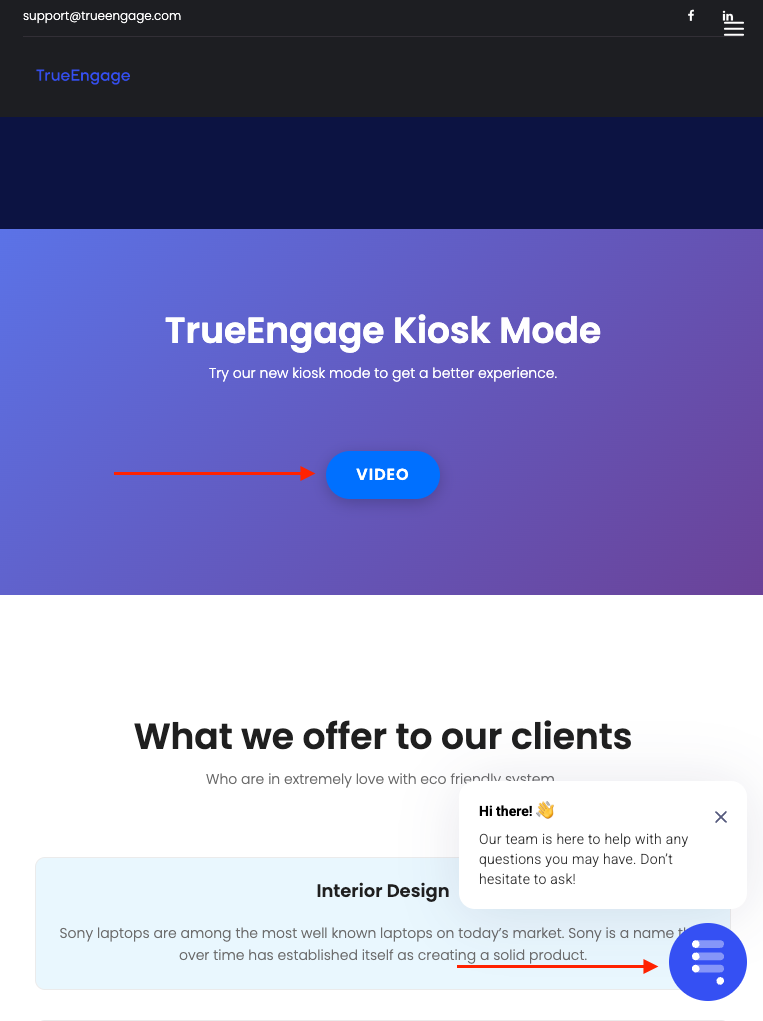
When test page is opened on Kiosk device (e.g. iPad), the additional section 'Kiosk Mode' will appear. After clicking 'VIDEO' button, the Video channel will be open using the JavaScript function provided.
In the example below, Button and Heads-Up Engagements are turned on, so the visitor can also use a widget button to open the video channel.
The Kiosk mode can also be simulated on the desktop browser, using 'Device mode' features - https://developer.chrome.com/docs/devtools/device-mode
Best Practices for Kiosk Deployments
-
Use Secure Browsers: Kiosk devices should run in a controlled browser environment with microphone and camera permissions pre-approved.
-
Optimize Network: Follow Voice and Video network requirements:
https://kb.trueengage.com/kb/trueengage-and-genesys-cloud-integration-for-video-calls
TrueEngage WebRTC Architecture (for Audio Configuration) -
Use Visitor Blur for privacy compliance in public environments.
Troubleshooting
Widget stays in kiosk mode after switching off “Device Mode” in browser
When testing kiosk mode on a desktop browser, you may use the browser’s Device Mode (for example, Chrome DevTools → Toggle device toolbar) to simulate a mobile or kiosk environment.
TrueEngage stores the kiosk/regular mode preference locally in the browser using localStorage. This means the kiosk mode setting persists across reloads until manually cleared.
To reset the widget mode to normal, clear your local storage:
localStorage.clear()
Run this command in your browser’s Developer Console, then refresh the page.
The widget should now revert to its regular (non-kiosk) mode.